
IFTTT have recently released a new channel for easy integration with 'DIY' projects.
For those of you that have not heard about IFTTT (If This Then That) it is a way of linking events on one service to actions on another. For example some of the things I use it for are;
- If I post a Facebook status message then send a tweet
- If I upload a new YouTube video post to Facebook
- If I weigh on my Fitbit Aria log the weight in a Google Drive Spreadsheet
You get the idea, if something happens then do something. This is all great, apart from you are limited to only the 'channels' supported by IFTTT. That is until now.
The new Maker channel can both receive events via a simple HTTP/REST API and make simple HTTP requests in response to events from other channels. This enables easy integration with your own custom projects.
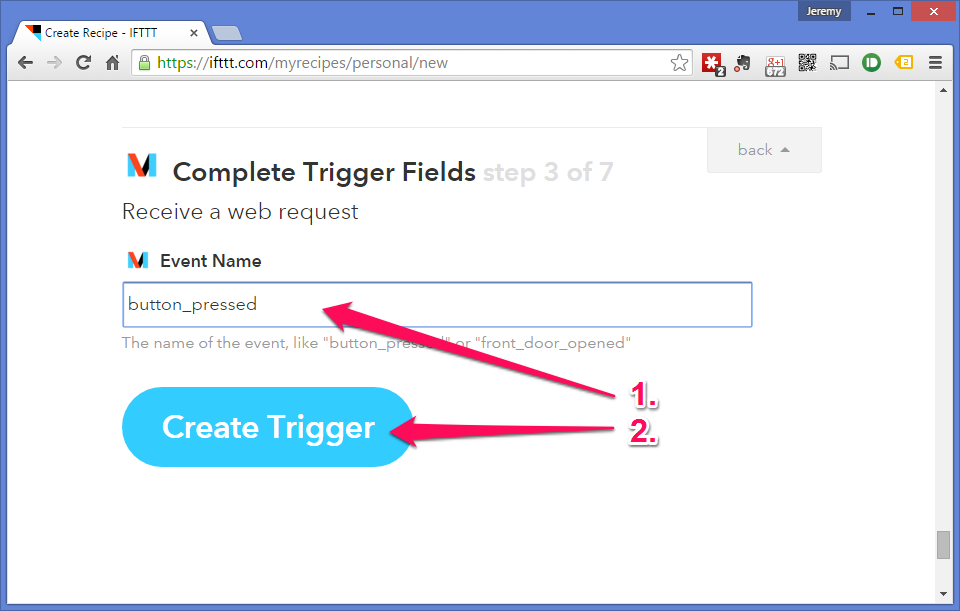
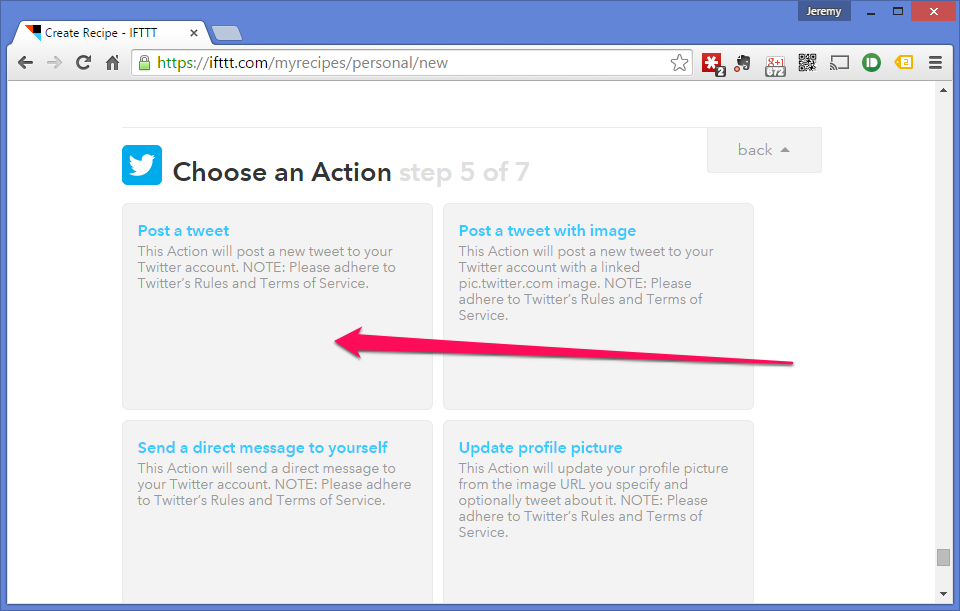
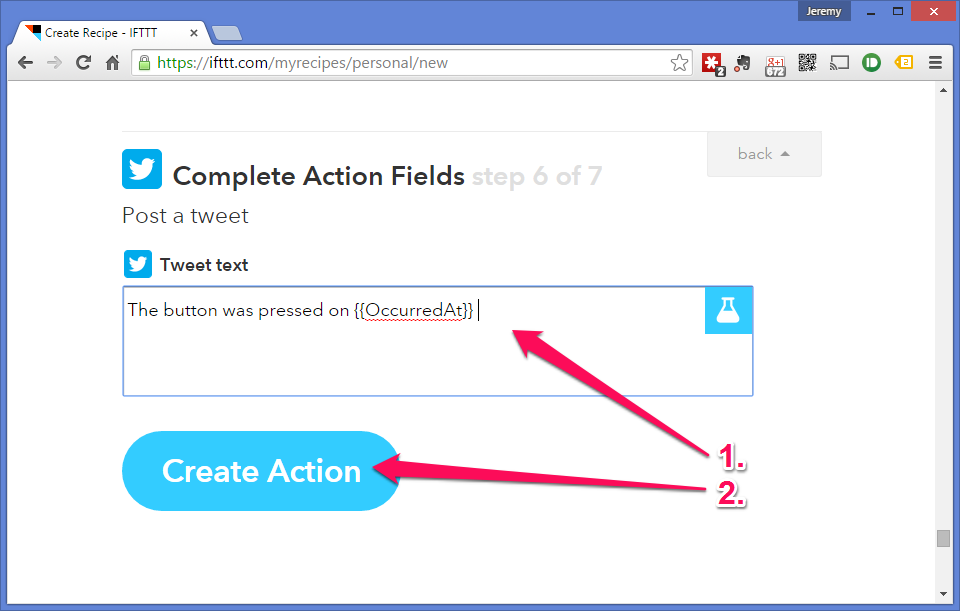
As an example lets make a button press send a Tweet via IFTTT.
IFTTT setup
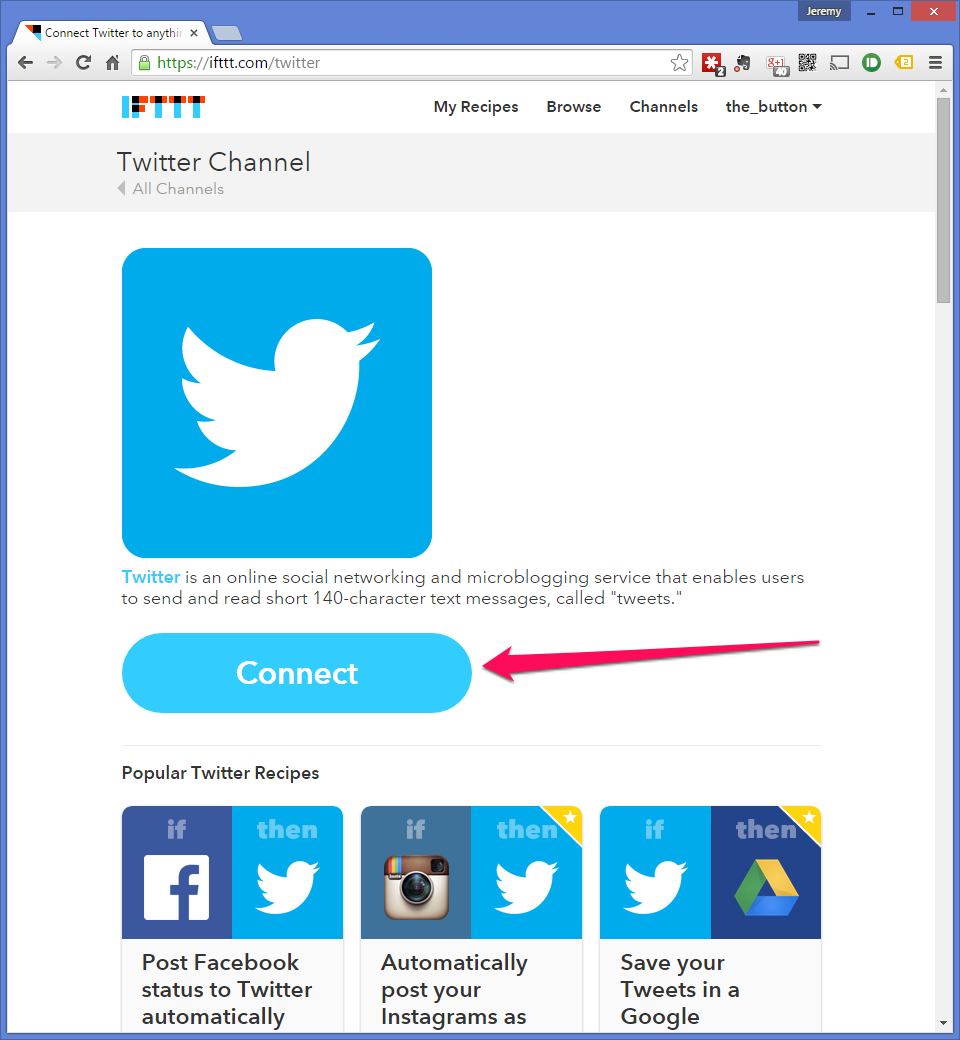
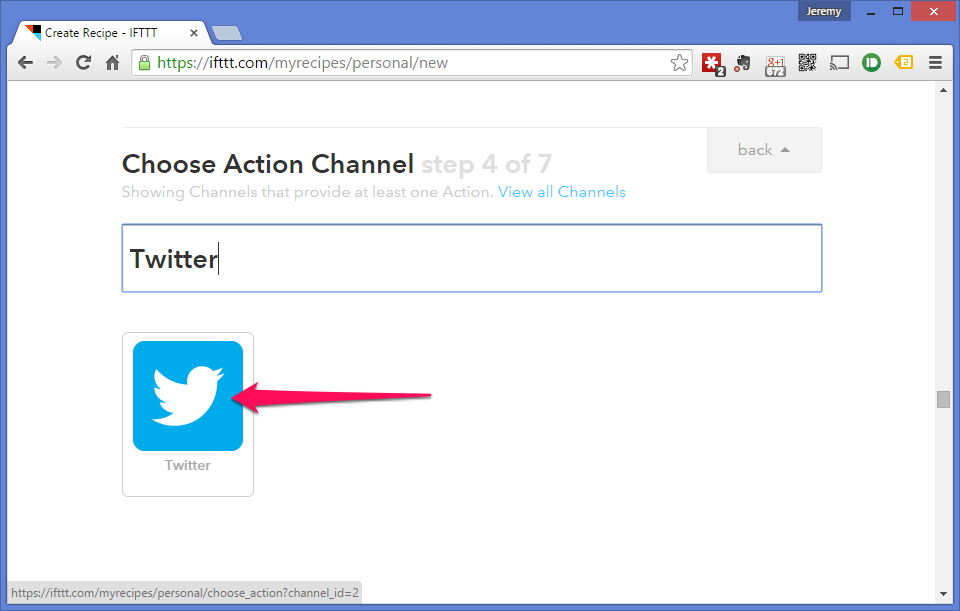
We will start off by connecting to the Twitter channel: https://ifttt.com/twitter;

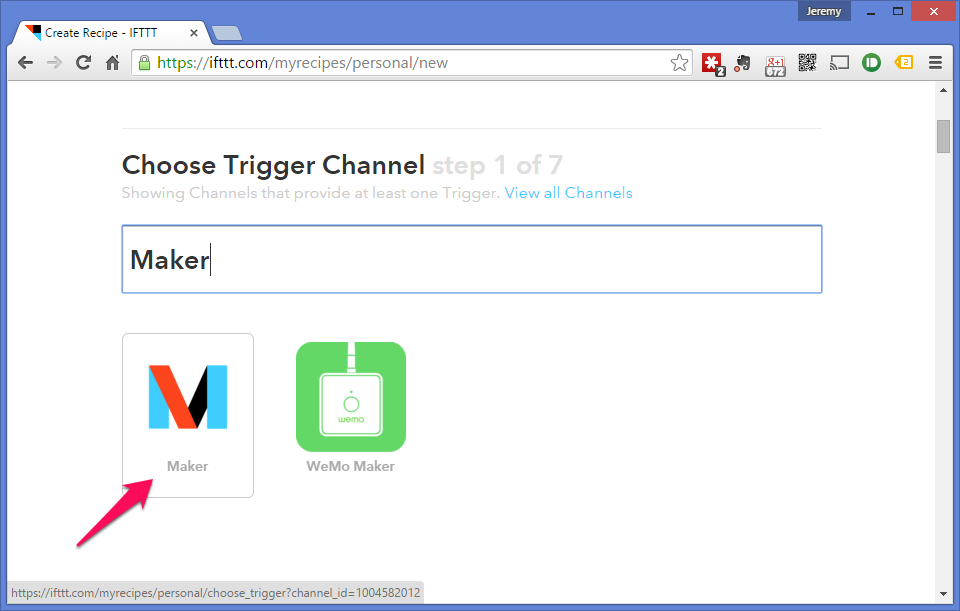
Next we need to connect to the Maker channel so go to https://ifttt.com/maker and select Connect;

Connecting to the Maker channel
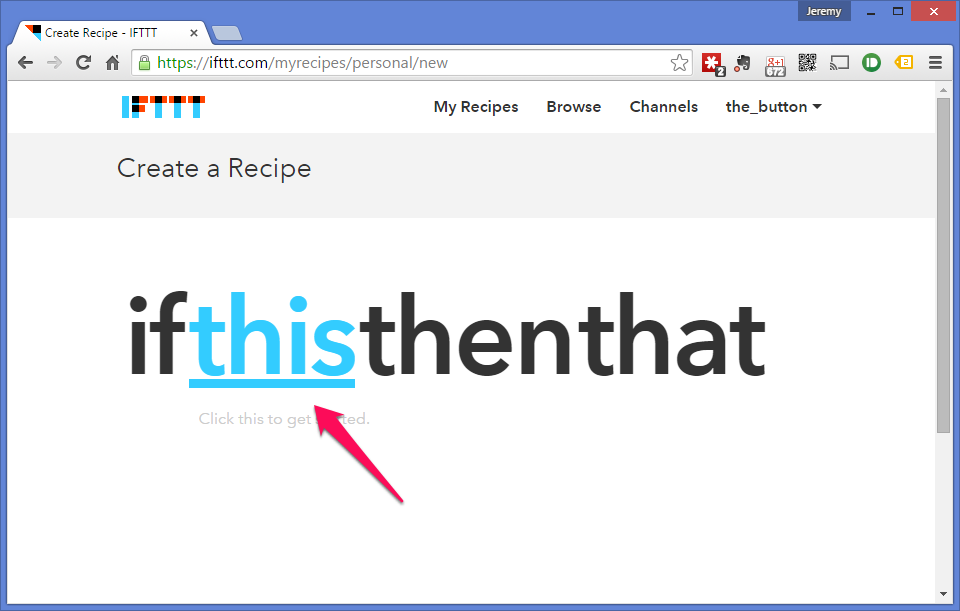
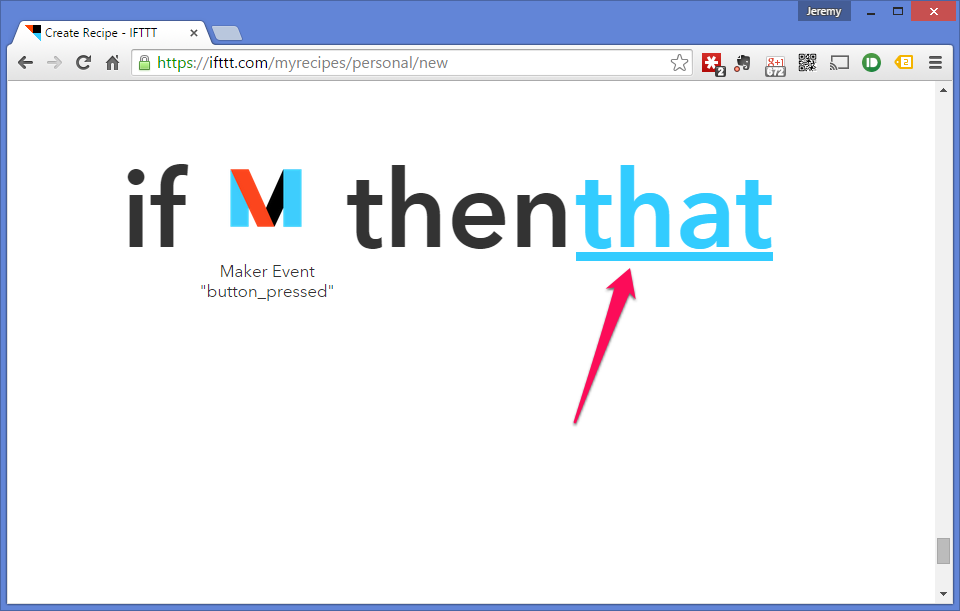
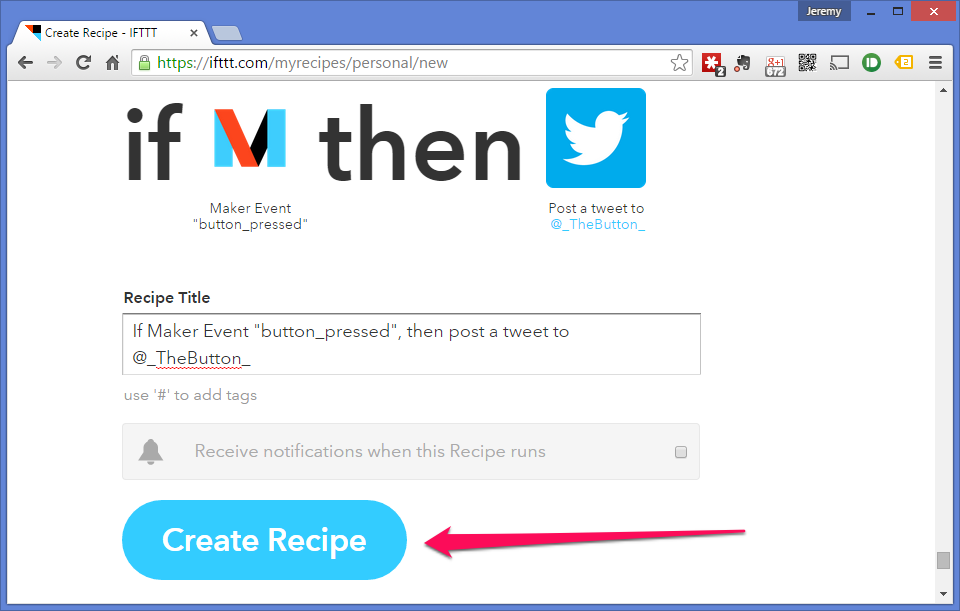
Now we are connected to the twitter and Maker channel we need to link the two. This is done using recipes. To create a new recipe click on your username in the top right and select Create;

Creating a new recipe
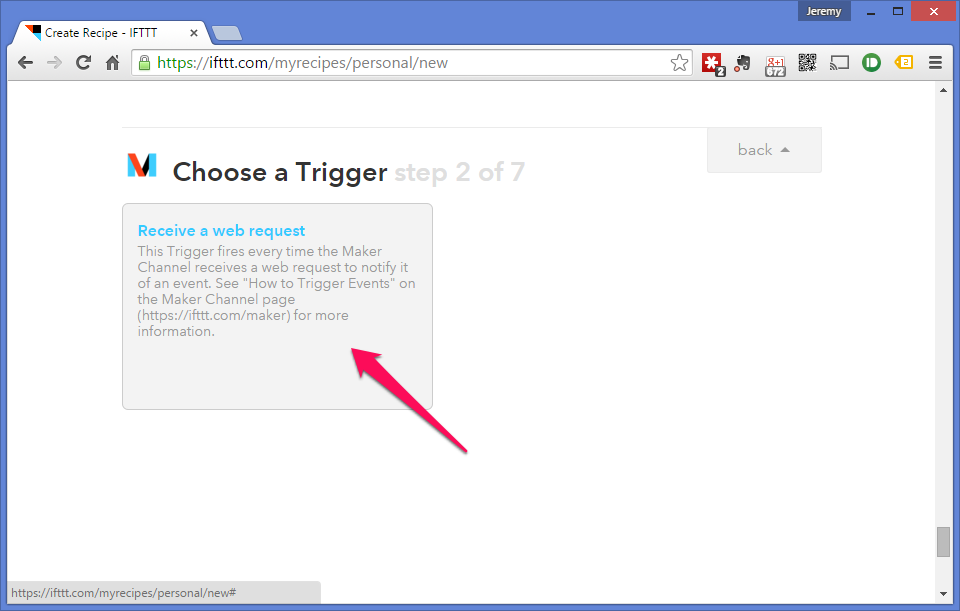
Then follow through the steps;
The Hardware
Now for the hardware. For this I am using Adafruit's HUZZAH ESP8266 Breakout as this is a bit more friendly for development but this should work just as well on any ESP8266 board like the ESP-01.

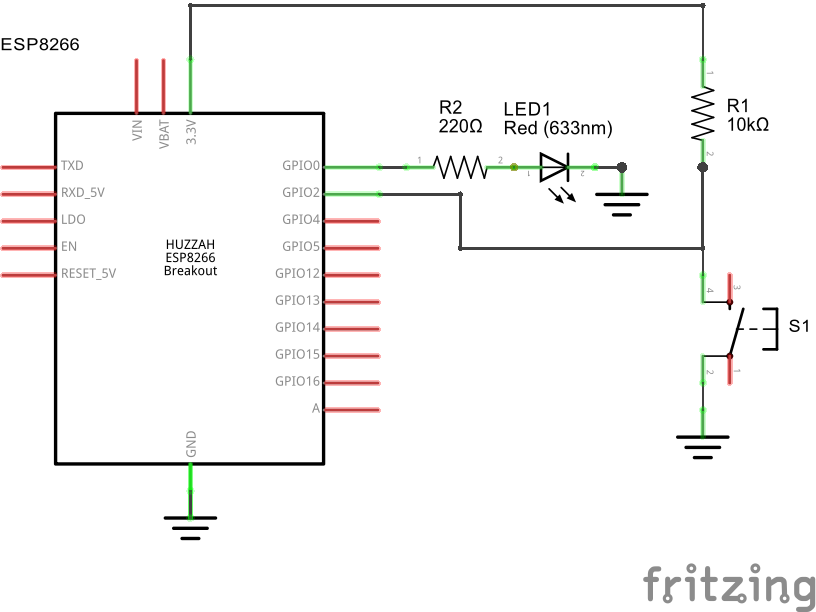
It is a fairly simple circuit, just an LED for status (not strictly required with the HUZZAR as it has an LED on board but helpful for other ESP boards) and a button with a pull up resistor.
The Software
The software is nice and simple, it is based on the WiFi Client sample code from the ESP8266 Arduino core as well as the button de-bounce example.
/*
 *  This sketch sends data via HTTP GET requests to IFTTT Maker channel service.
 *
 *  You need to  privateKey from the Maker channel on IFTTT and paste it
 *  below.
 *
 * Based on the example code for WiFi client and button debounce example from Arduno IDE
 */

#include <ESP8266WiFi.h>

void send_event(const char *event);

// constants won't change. They're used here to
// set pin numbers:

// Wifi setup
const char *ssid     = "WiFi_SSID";
const char *password = "Password";

// IFTTT setup
const char *host = "maker.ifttt.com";
const char *privateKey = "xxxxxxxxxxxxxxxxxxxxxx";

// Hardware setup
const int buttonPin = 2;     // the number of the pushbutton pin
const int ledPin = 0;        // the number of the LED pin

// Variables will change:
int buttonState;             // the current reading from the input pin
int lastButtonState = LOW;   // the previous reading from the input pin

// the following variables are long's because the time, measured in miliseconds,
// will quickly become a bigger number than can be stored in an int.
long lastDebounceTime = 0;  // the last time the output pin was toggled
long debounceDelay = 50;    // the debounce time; increase if the output flickers

void setup()
{
  // Set your pin modes
  pinMode(buttonPin, INPUT);
  pinMode(ledPin, OUTPUT);

  // Bring up the serial for a bit of debugging
  Serial.begin(115200);
  delay(10);

  // We start by connecting to a WiFi network
  Serial.println();
  Serial.println();
  Serial.print("Connecting to ");
  Serial.println(ssid);

  WiFi.mode(WIFI_STA);
  WiFi.begin(ssid, password);

  // Wait for the connection, flashing the LED while we wait
  int led = HIGH;
  while (WiFi.status() != WL_CONNECTED) {
    delay(200);
    digitalWrite(ledPin, led);
    led = !led;
  }
  digitalWrite(ledPin, LOW);

  Serial.println("");
  Serial.println("WiFi connected");
  Serial.println("IP address: ");
  Serial.println(WiFi.localIP());
}

void loop()
{
  // read the state of the switch into a local variable:
  int reading = digitalRead(buttonPin);

  // check to see if you just pressed the button
  // (i.e. the input went from LOW to HIGH),  and you've waited
  // long enough since the last press to ignore any noise:

  // If the switch changed, due to noise or pressing:
  if (reading != lastButtonState) {
    // reset the debouncing timer
    lastDebounceTime = millis();
  }

  if ((millis() - lastDebounceTime) > debounceDelay)
  {
    // whatever the reading is at, it's been there for longer
    // than the debounce delay, so take it as the actual current state:

    // if the button state has changed:
    if (reading != buttonState)
    {
      Serial.print("Button now ");
      Serial.println(HIGH == reading ? "HIGH" : "LOW");
      buttonState = reading;

      // When the button is in the LOW state (pulled high) the button
      // has been pressed so send the event.
      if (buttonState == LOW) {
        send_event("button_pressed");
      }
    }
  }

  // save the reading.  Next time through the loop,
  // it'll be the lastButtonState:
  lastButtonState = reading;
}

void send_event(const char *event)
{
  // set the LED on whle we are sending the event
  digitalWrite(ledPin, HIGH);

  Serial.print("Connecting to ");
  Serial.println(host);

  // Use WiFiClient class to create TCP connections
  WiFiClient client;
  const int httpPort = 80;
  if (!client.connect(host, httpPort)) {
    Serial.println("Connection failed");
    return;
  }

  // We now create a URI for the request
  String url = "/trigger/";
  url += event;
  url += "/with/key/";
  url += privateKey;

  Serial.print("Requesting URL: ");
  Serial.println(url);

  // This will send the request to the server
  client.print(String("GET ") + url + " HTTP/1.1\r\n" +
               "Host: " + host + "\r\n" +
               "Connection: close\r\n\r\n");

  // Read all the lines of the reply from server and print them to Serial,
  // the connection will close when the server has sent all the data.
  while(client.connected())
  {
    if(client.available())
    {
      String line = client.readStringUntil('\r');
      Serial.print(line);
    } else {
      // No data yet, wait a bit
      delay(50);
    };
  }

  // All done
  Serial.println();
  Serial.println("closing connection");

  client.stop();

  // Finished sending the message, turn off the LED
  digitalWrite(ledPin, LOW);
}
In Action
-
 The button was pressed on November 24, 2015 at 01:20PM
 -
The button was pressed on November 24, 2015 at 01:19PM
-
The button was pressed on November 18, 2015 at 05:10PM
-
The button was pressed on October 26, 2015 at 02:52PM
-
The button was pressed on October 20, 2015 at 01:08PM
-
Raspberry Pi FTDI shim https://t.co/j3YwpNRRIf
-
The button was pressed on October 19, 2015 at 06:08PM
-
The button was pressed on October 19, 2015 at 12:02PM
-
The button was pressed on October 8, 2015 at 03:29PM
-
The button was pressed on October 5, 2015 at 10:30AM
And just to finish off here is a link to another tutorial on using the Maker channel.